This is my first real tutorial so please bear with me...I reserve the right to come back later and make adjustments. Feel free to point out any grammar or punctuation mistakes, I will not be offended.
Any one that knows me at all, in real life or just on Facebook, knows that I am a babywearer. Well, at one of the babywearing meet ups I saw something that I just had to have/make; a poncho that would fit over both of us. I found this tutorial and really liked the step by step directions and the way it draped but did not like the tied part of it. I also found this one and liked the idea of a collar, however I needed better step by step directions. Finally, I found this DIY for a kids poncho and really liked how it was sewn together and the step by step directions but it was for a kid not an adult. SO I took the measurements from one, the collar from another, and the technique from the third and came up with this project.
Materials:
- 2 yards fleece
- Matching thread
- 1 roll of wrapping paper
- pen/pencil
- straight pins
- scissors
- yardstick/tape measure
- sewing machine
- something round about the size of baby's head to trace
I recommend using solid color fleece if you are not proficient with sewing. I used a print here because my dear husband picked it out for me and I love it.
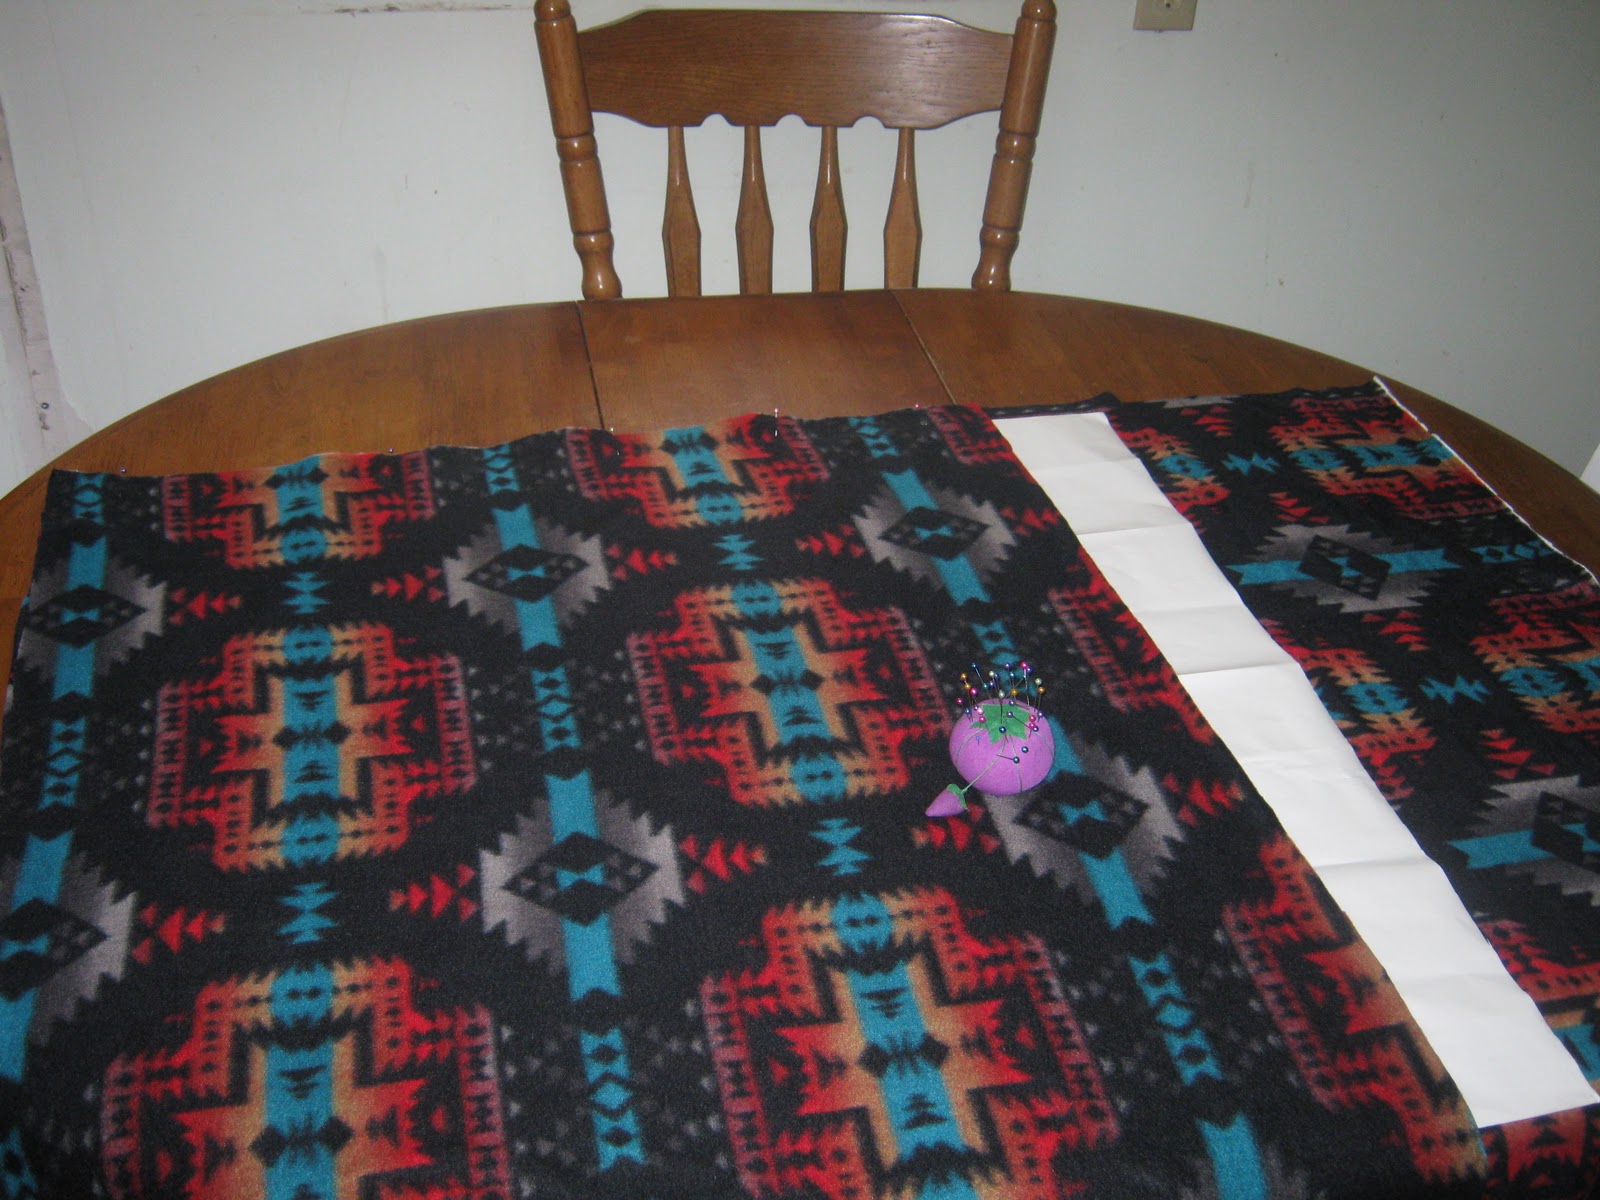
 Start out by cutting a pattern out of the wrapping paper. Because I am on the plus side I decided that I needed two pieces one 30 inches by 40 inches for the front and one 36 inches by 46 inches for the back. If you are not a bigger person like myself then you will only need to cut one 30x40 inch pattern.
This is where I discovered that the wrapping paper is only 30 inches wide. The dimensions of the pieces in the picture to the right are one 30x40 in rectangle, three 6x30 in strips. (one strip will need to be trimmed to 6x16)
 Next lay out your fabric on the table and pin the pattern to it. I did the larger back piece first and added the 6 inch strips to two sides to get the
 larger size.
Cut around the pattern to get your back piece.
If you are not a larger person like myself you can skip this step and cut TWO 30x40 in pieces instead

Lay out the remaining fabric, pin the 30x40 in rectangle pattern
piece in place, and cut around the pattern to get your front piece.
Don't forget: CUT TWO of these if you don't need the extra room that I do.
Here is where it starts getting tricky to explain so, again, please bear with me.

Lay the back piece out on the table and pin the short side of the front piece to the long side of the back piece.
Yellow arrow- upper left corner where you will start stitching
Blue arrow- extra length on back piece that will become the collar for mama.
Green arrow points to the strip of paper I put in to differentiate between the layers of fabric.

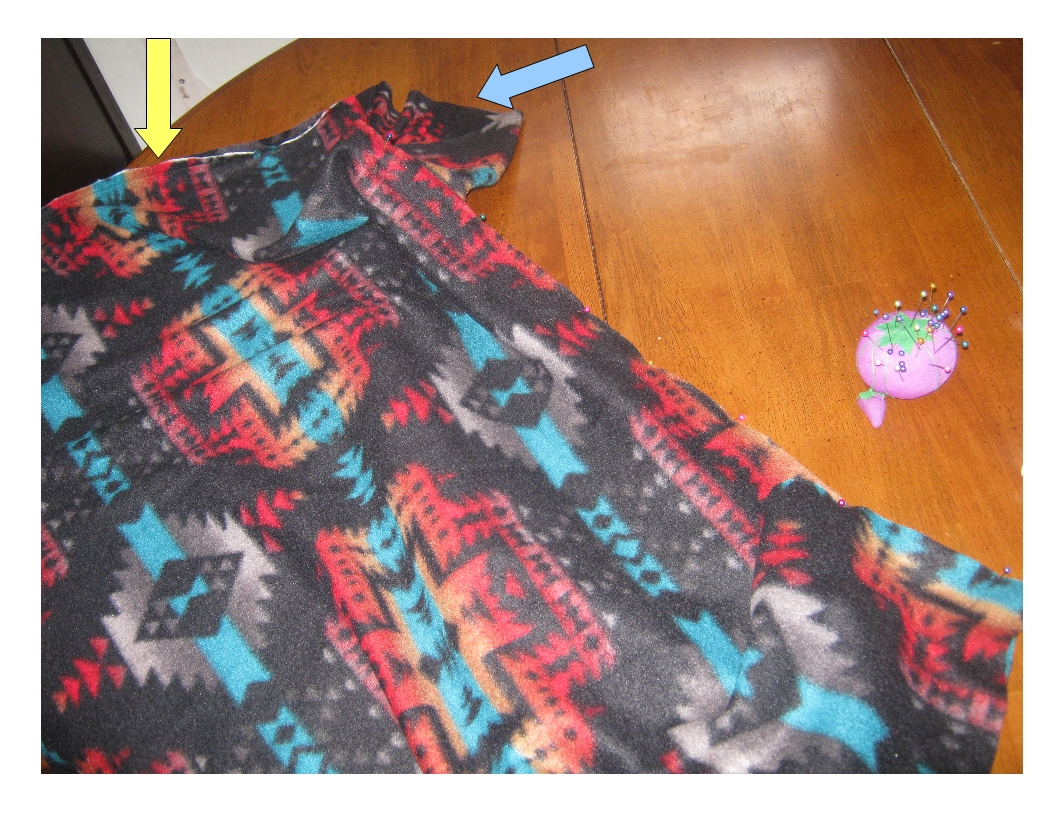
Now stitch the edge where you pinned. I used a straight stitch with a quarter inch seam. On most machines to get a quarter inch seam you line the edge of your fabric up with the edge of the foot.
After stitching lay the fabric out the same way you pinned it. On the RIGHT edge take the short side of the back piece and pin it to the long side of the front piece. You will have an opening that will not be sewn, this will be the opening for mommy's head.
Yellow arrow- the edge that is already sewn
Blue Arrow- the opening for mommy's head
Stitch the edge you pinned just like you did on the first edge.
After sewing the second edge I slipped it over my head to make sure that it would fit over my head.

 Time to hem the collar. Make sure it is still inside out and turn down 1/2 inch of the collar and pin.
I set my machine up for free arm sewing so that I could slide the collar over the arm and stitch.
This picture shows the collar turned down 1/2 inch and pinned. When I stitched I lined up the edge of the fabric with the slot in my foot and straight stitched it.

I needed help with this next part so I grabbed my sister in law and had her put the poncho on. I measured 7 inches from the top of the collar and marked it with a pin.
 Next I made the pattern for the opening for baby's head by taking a
bucket that he is fond of putting on his head (hey, I knew it would fit over his head this way) and tracing it on paper.

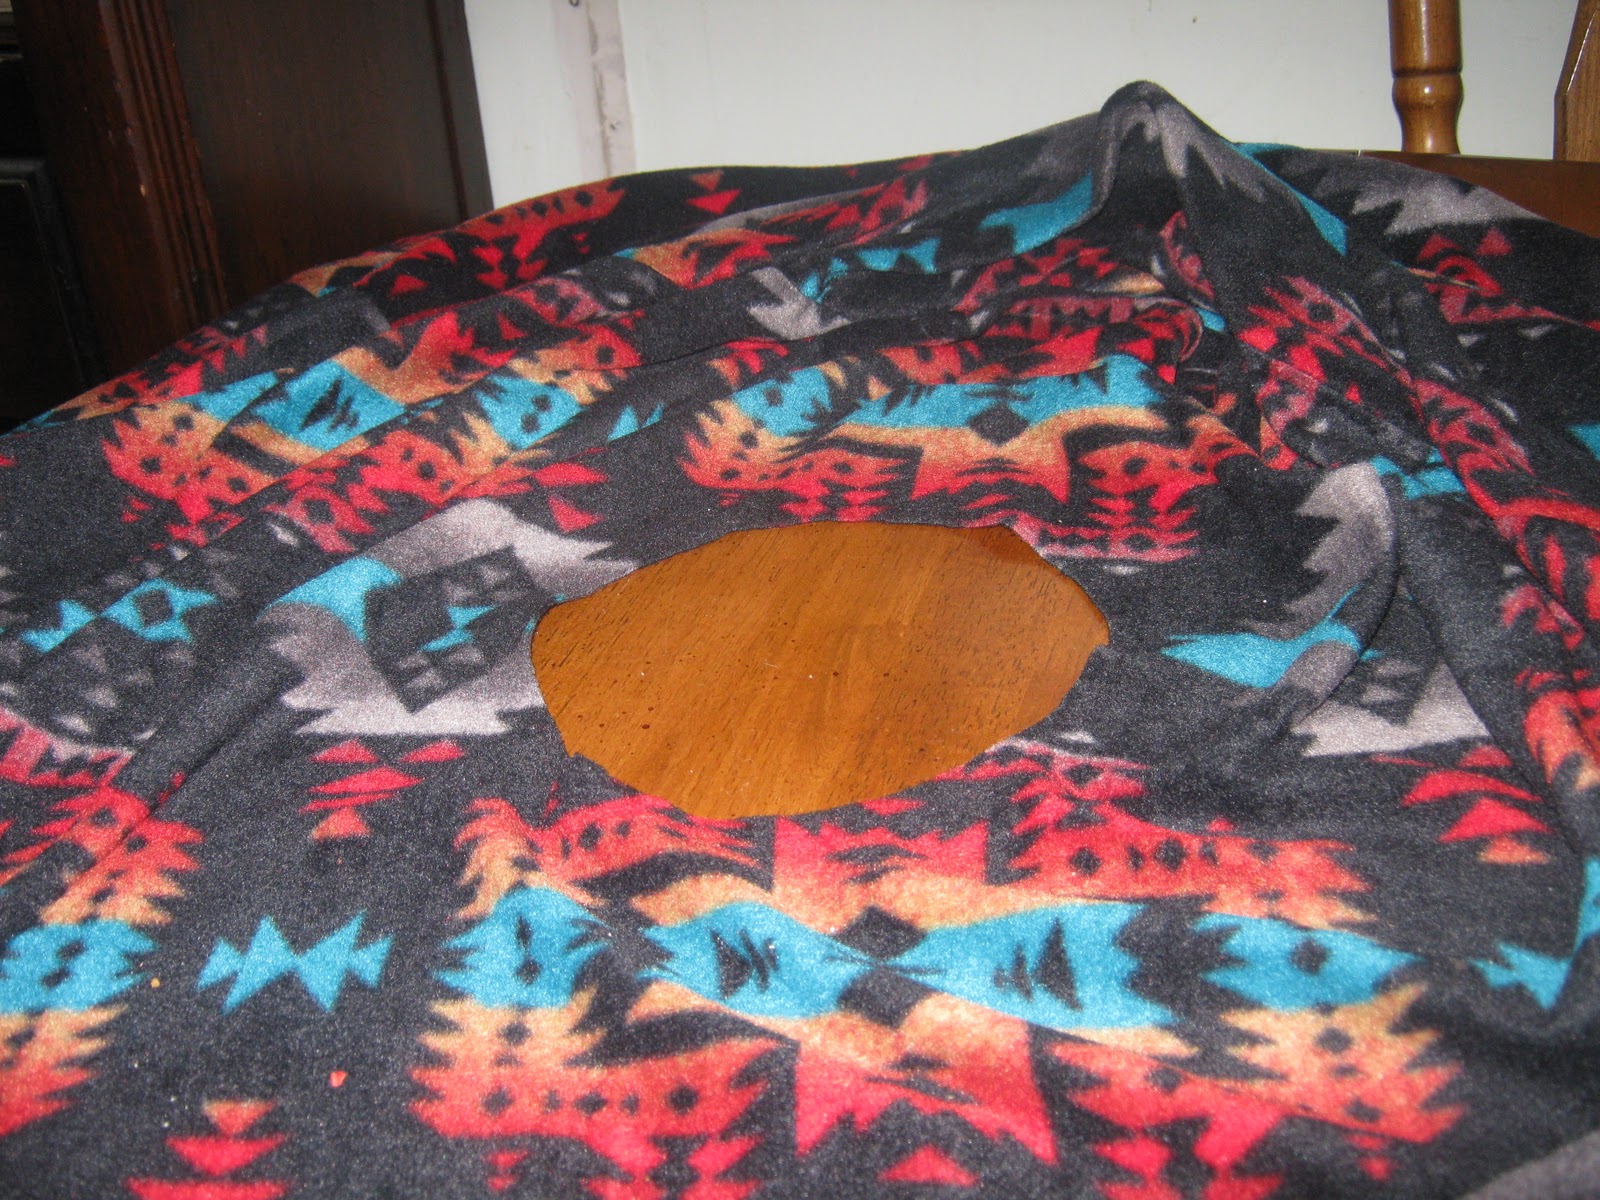
Center the circle pattern under the pin and pin it in place.
Cut around the pattern. (Make sure you are only cutting one layer of fabric here)

For baby collar: cut out a rectangle of fleece 2.5 inches by 26 inches

Fold the rectangle in half and stitch short edges together.
 Take the loop you just made and fold it in half the long
way with the seam inside and you will have a double thick loop. Turn the poncho inside out with the seams facing out and put the collar piece inside the opening for baby's head. Match up the three raw edges and pin. Stitch around the raw edges like you did for mommy's collar.
Turn right side out AND ITS DONE!

Oh yeah, I had extra fabric left so I made the matching hat using this TUTORIAL
OK please be honest here, what do you think of my first tutorial?